Azure AD SAML (Security Assertion Markup Language) is a security solution that adds an additional layer of security to enterprise systems. It requires users to use another authentication method in addition to their password, reducing the risk of unauthorized access. Azure AD SAML enables enterprises to ensure that even if someone knows a user's password, they cannot log in without another authentication method, thereby protecting the system from unauthorized access.
1. Cloud directory metadata file export and certificate renewal
- Open Cloud Director and navigate to Administration → Identity providers → SAML
- Press "regenerate certificate" so that the certificate is up-to-date
- Press "configure"

- Press the "Retrieve Metadata" button - then a file in .xml format will be downloaded

2. Setting up the SAML Identity provider in the Azure admin portal
- Login to https://portal.azure.com/
- Put "enterprise applications" in the search box and click on the exact result

- Press the button "new application"

- Press "+ Create your own application"

- Name the new application and press the "create" button

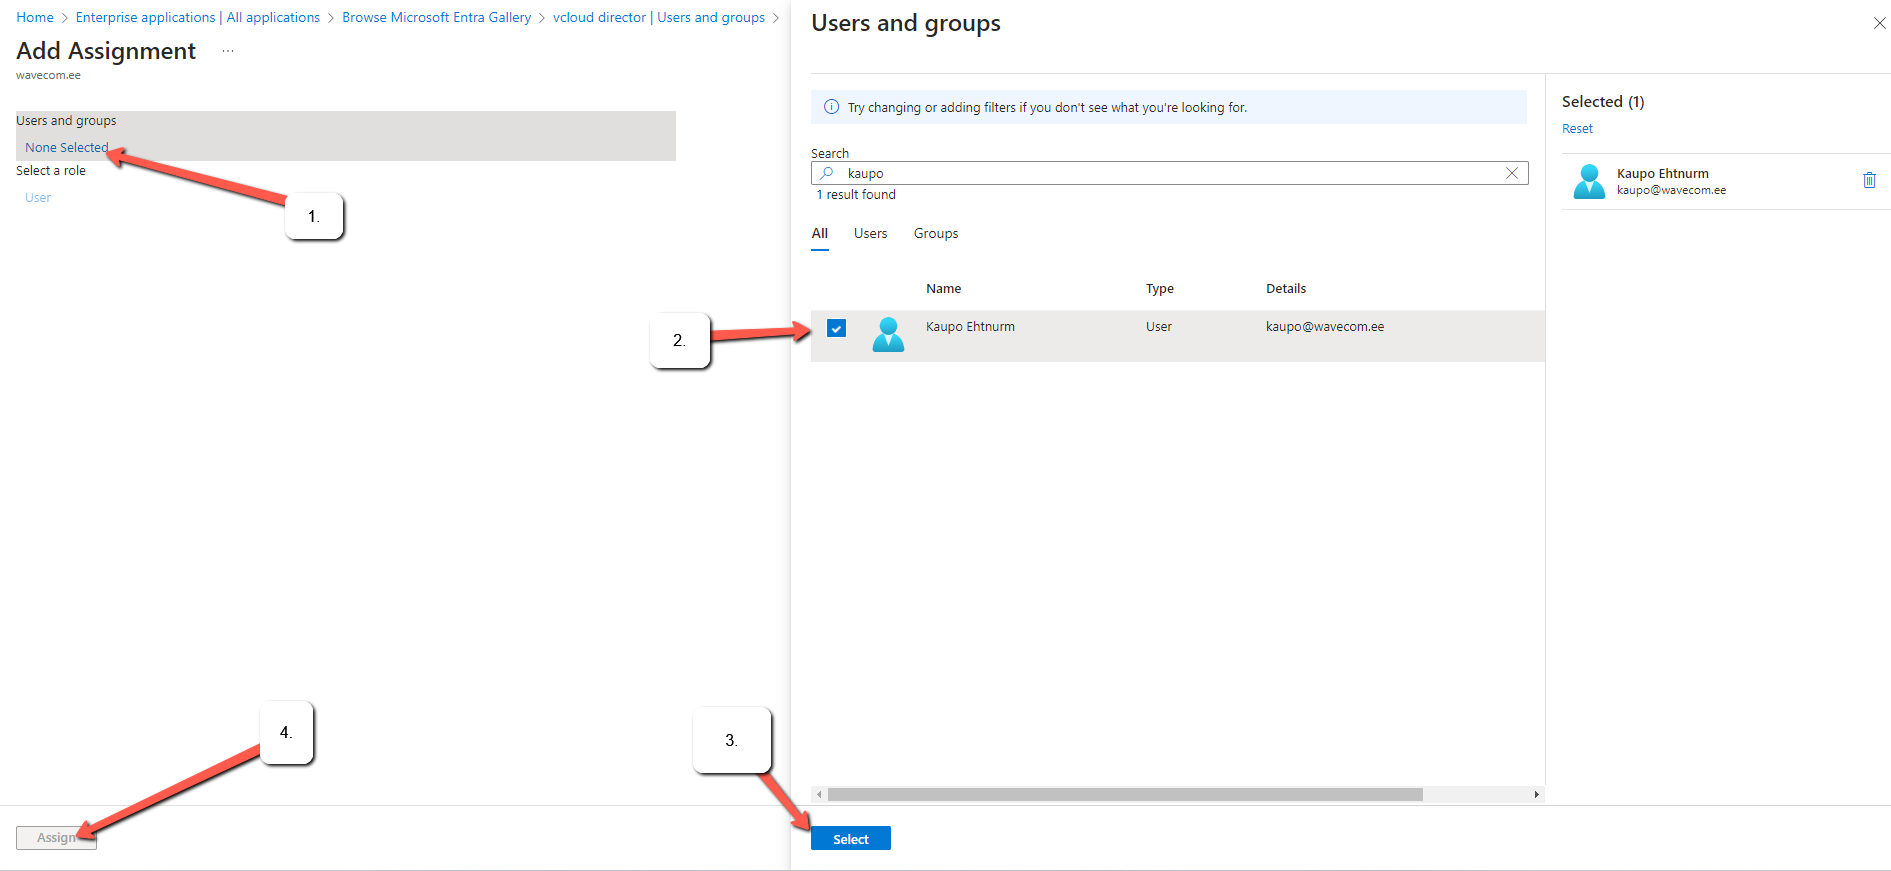
- Press the "Assign users and groups" button

- Press the "Add user/group" button

- Select the desired users/groups (We do not recommend using the groups option for security reasons)
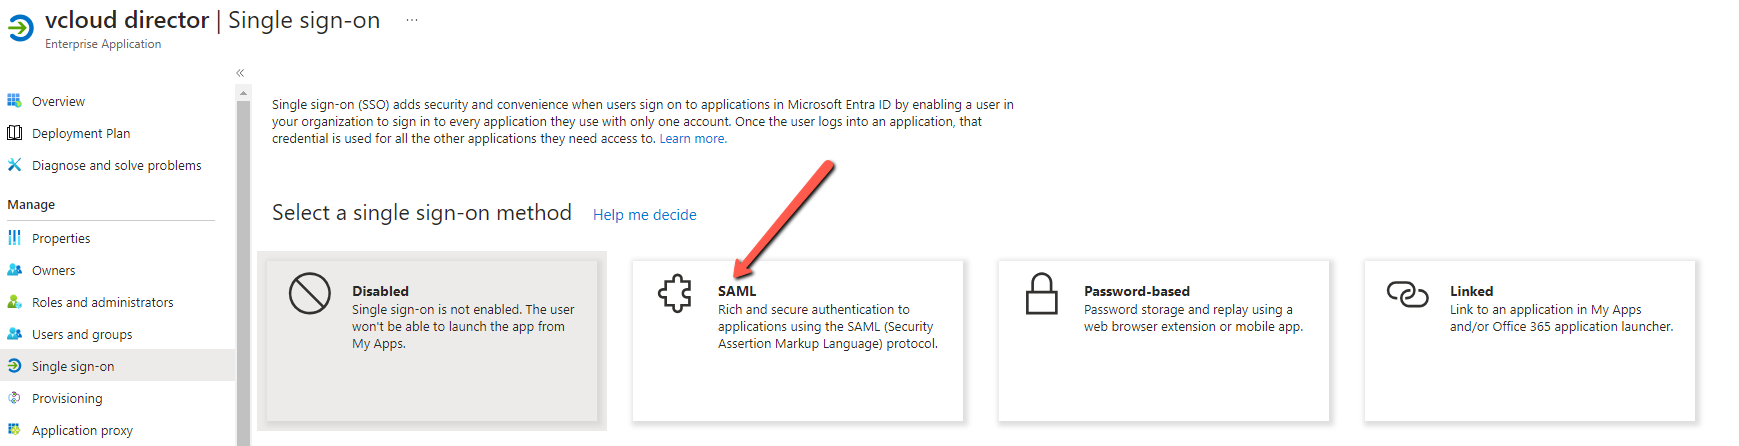
- Navigate to the "single sign-on" option

- Select "SAML"
- Upload the .xml file received from the cloud

- Copy the login url of your tenant - for example https://cloudtest.wavecom.ee/tenant/
- The tenant url can also be found if you navigate to the cloud page and copy the part shown in the image

- Paste the Tenant URL in the "Sign on URL" field
- Copy the "Identifier" field and press "Save"

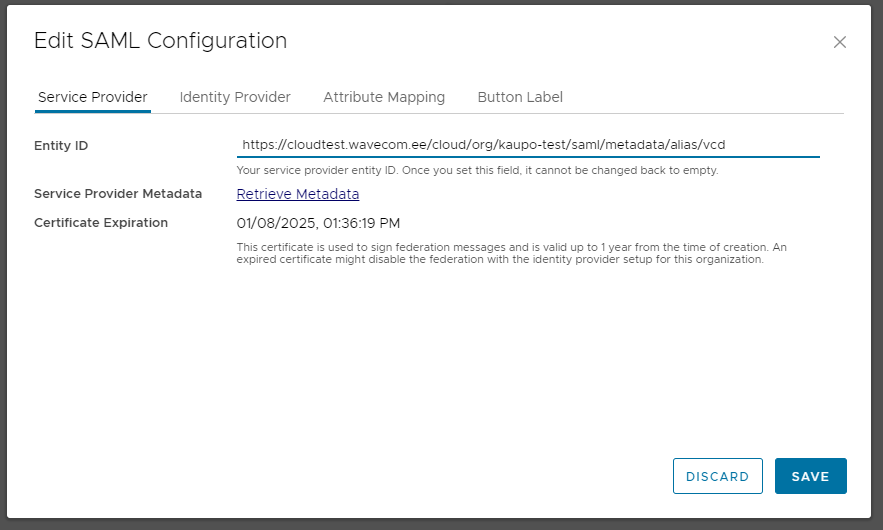
- Paste the identifier value in the "Entity ID field" of your cloud
- Navigate back to the Azure view and download the metadata .xml file provided by Azure

- In the Cloud view, navigate to the "Identity Provider" view
- Check "Use SAML Identity Provider"
- Load the .xml file you received from Azure and press "Save".

3. Importing users to the cloud
- Navigate to Administration → Access control and select Users

- Press import users → enter the desired user's email address
- Set permissions, press "save"

